Di tutorial kali ini ane akan nunjukin nih cara membuat
desain logo kreatif hasil kreasi ane sendiri, nih hasil gambar jadinya (in this
tutorial, I will show you how to make a creative logo version 3, thats the
exported logo :
Kerenkan gan, hehe nih ane tunjukin tutorialnya (Very cool
isnt ? now I will show you how to make it) :
kerenkan gan, hehe nih langsung ane kasih aja tutorialnya :(very cool isnt ? now, I will show you how to make it) :
1. buka CorelDraw anda, versi berapa terserah saja (open your CorelDraw)
2. Setelah dibuka klik pilihan new document, seperti pada gambar (after opened, click new document)
3. setelah itu akan muncul layar kerja, ubah tampilan layar kerj a anda menjadi berbentuk landscape atau memanjang (after that working screen will appear, change your work screen into landscape)
4. setelah itu buat sebuah lingkaran menggunakan ellipse tool pada toolbox (draw an ellipse with ellipse tool in toolbox)
6. buat gradasi pada lingkaran, dengan menggunakan interactive fill tool, lalu klik fountain fill (make the gradation in the ellipse, with using interactive fill tool, and click fountain fill)
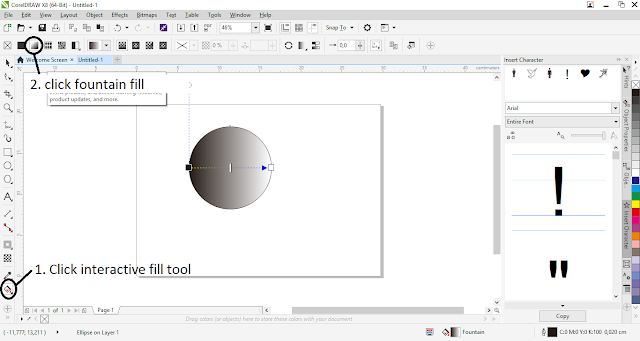
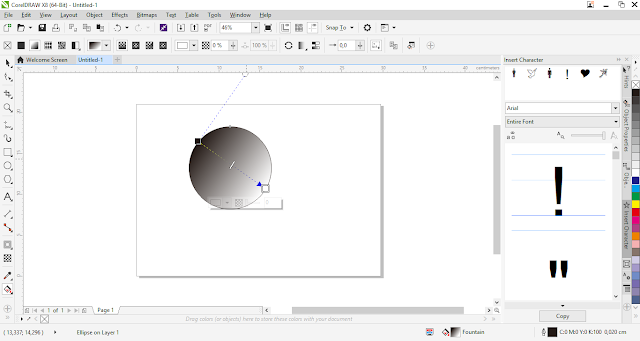
Ubah arah gradasi nya menjadi seperti gambar (change the gradations position like in the picture) :
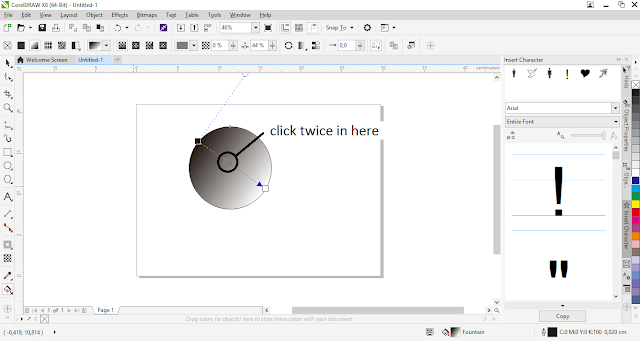
Klik pada tengah titik gradasi dua kali (Twice Click in the gradation point) :
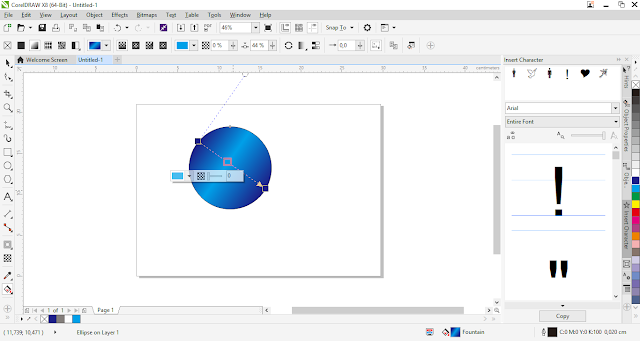
Ubah warna gradasi, klik salah satu titik gradasi, dan ganti dengan warna lain yang disukai pada color pallete (change the color gradation, click in one of gradation point, and change with other color in the color pallete) :
Lakukan dengan cara yang sama pada titik gradasi yang lain (Do it With Same procedur with other gradation point) :
7. buat sebuah lingkaran didalam lingkaran tersebut, dengan menggunakan ellipse tool di toolbox, buat dulu lingkaran nya dengan mengklik ellipse tool. ( make an ellipse on the first ellipse with using ellipse tool in toolbox, first make the llipse with clicking ellipse tool)
8. arahkan kedalam lingkaran tadi, dan klik Ctrl+mouse kiri dan tahan hingga menjadi lingaran sempurna (make the smallaer ellips in the first ellipse, click Ctrl+left mouse and hold till it be perfect ellipse)
9. seleksi dua lingkaran tadi, lalu klik back minus front (Selection this both ellipse, and click back minus front)
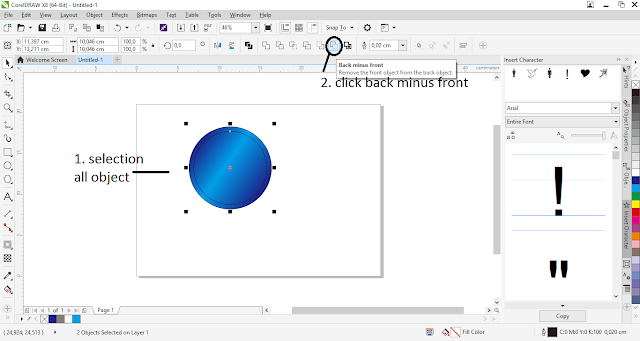
Hasil (result) :
10. buat sebuah segitiga disamping lingkaran, dengan menggunakan polygon tool pada tool box, dan atur seginya menjadi segitiga (make a triangle beside the ellipse, with using polygon tool in toolbox.)
11. Putar Rotasinya menjadi 90 derajat (change the rotation into 90)
12. letakkan segitiga diatas lingkaran (put the triangle on the ellipse)
Lalu seleksi semua objek dan potong lingkaran dengan menggunakan back minus front (the, selection all object and slice the ellipse with using back minus front)
Hasil (result) :
13. buat sebuah lingkaran kecil disamping lingkaran tadi dengan menggunakan ellipse tool di toolbox ( make a small ellipse beside the first ellipse with using ellipse tool in toolbox)
14. warnai lingkaran itu dengan gradasi warna biru ke biru muda, dengan menggunakan interactive fill tool, klik interactive fill tool lalu klik fountain fill dan klik elliptical fountain tool (give the ellpise with color gradation from blue to cyan, with using interactive fill tool, click interactive fill tool, then click fountain fill and click elliptical fountain fill)
15. ganti warna gradasi dari yang awalnya hitam keputih menjadi biru tua kebiru muda, dengan mengganti warnanya pada color pallete (change the color, at the first black to white, to be blue to cyan, eith change the color on color pallete)
16. seleksi kedua objek lalu duplikat atau perbanyak sebanyak 3 ali dengan cara klik Ctrl+D sebanyak 3 kali (selection all objct and duplicate 3 times with clicking CtrlD 3 times)
Ubah gradasi warna seperti pada cara sebelumnya (change the gradation like in the last procedure)
Lalu putar rotasi nya dengan mengatur nya pada angle of rotation ( and change the rotation with using angle of rotation)
Lalu perkecil setiap objek seperti ini (make all object have different size)
Tutorial logo kreasi versi 3 sudah jadi, selamat mencoba J
(Tutorial Of logo creation versi 3 is finished, goodluck




No comments:
Post a Comment